本篇文章给大家介绍如何用前端代码实现一个烟花绽放的绚烂效果,其实主要就是用前端三剑客来实现,也就是HTML+CSS+JS,下面一起来看一下,作者会解说相应的代码,希望对需要的朋友有所帮助。(ps:之所以有这篇文章是由于作者所在地区禁止放烟花…哈哈)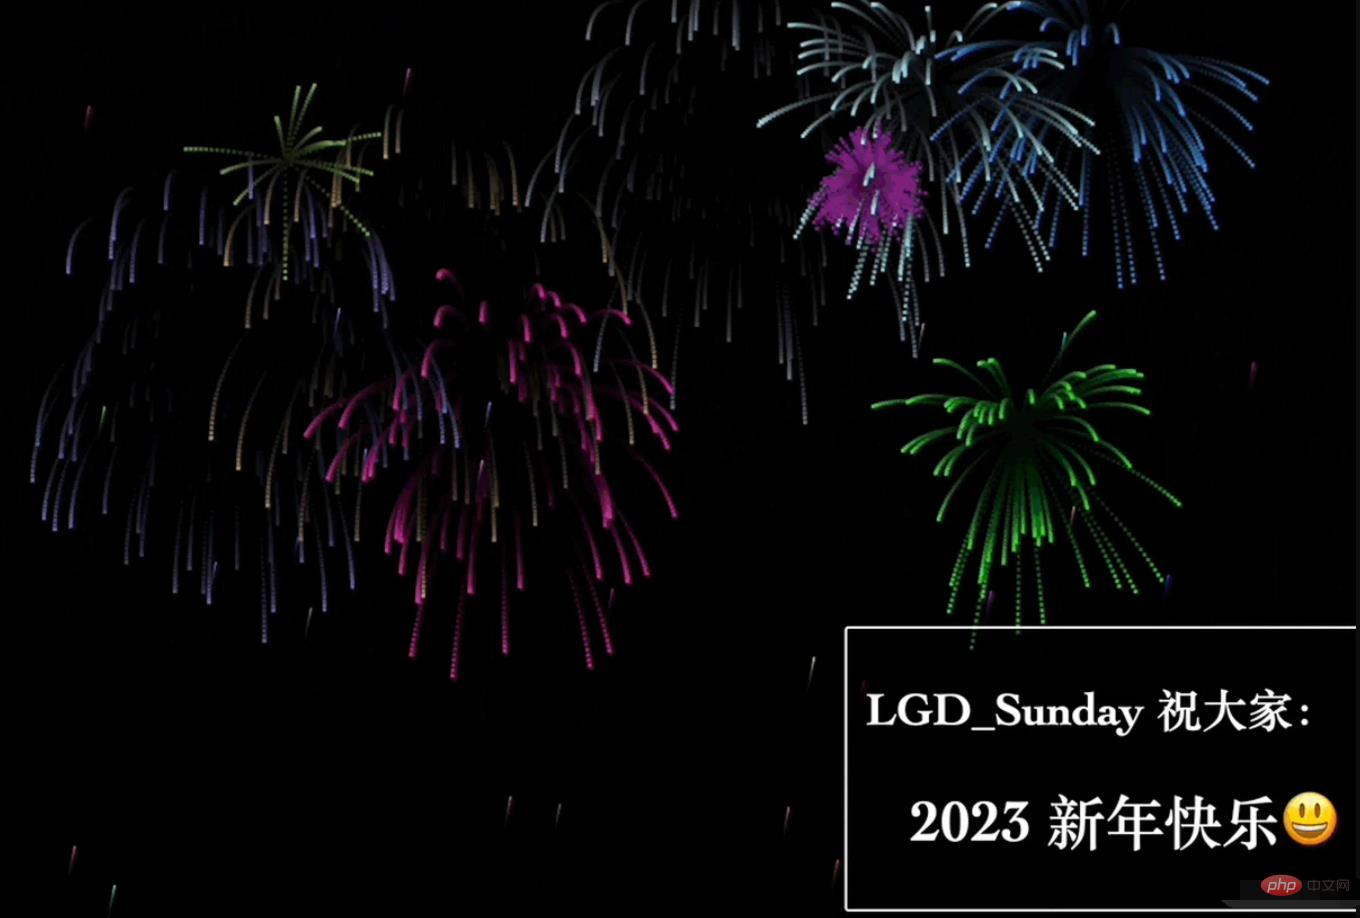
↑↑↑↑↑↑ 效果图镇楼 ↑↑↑↑↑↑
序
不知道是在什么时候,济南就开始都在传:“今年不再限制放烟花啦!”。一些集市上也开始有了售卖烟花的摊子

大家都很兴奋,很多小伙伴开始购买烟花。特别是今年特别火的 “加特林 ?”
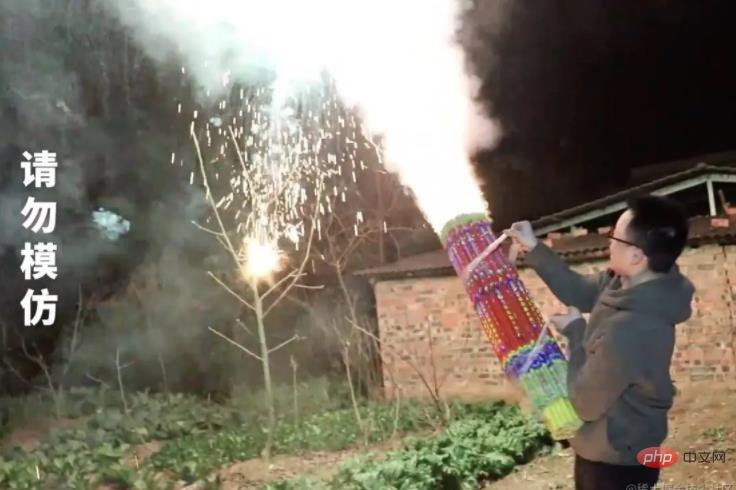
但是大家兴奋劲还没过呢,随着官方 一纸禁令,让咱们知道了:
2023 过春年
烟花依然了无缘

让我们这些屯了烟花的可咋办啊 ??????

不过身为程序猿的我们,能就这么认栽了?
我们可是要用代码改变世界的人啊~~~~

所以我辛苦闭关九九八十一秒(开玩笑~我写了好几天),终于把烟花放到了浏览器上,看着效果我是“内牛满面(泪流满面)”啊!

此时,我真想仰天长啸,大声唱道:
2023 过春年,
烟花依然了无缘;
这能难倒程序猿?
一键三连过大年!
代码
下面开始上菜(代码)咯~~~
咱们整个的代码一共分为三个部分:
-
html:用来构建项目结构
-
css:处理文字样式
-
js(核心):处理烟花逻辑
那么下面,咱们就针对这三个部分,分别进行处理:
1. html
整个 html 分为两部分:
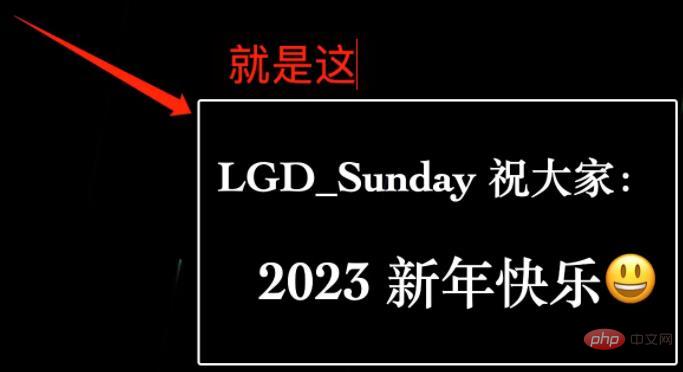
- 文字结构:用来处理右下角的文本
 2. canvas 画板:作为烟花渲染区
1. 文字结构
文字结构整体的内容处理会比较简单,通过div包裹“文本标签”即可:
<!-- 文字修改区 --> <div class="title"> <h2>LGD_Sunday 祝大家:</h2> <h1>2023 新年快乐?</h1> </div>
2. canvas
canvas 作为 web 为我们提供的画板工具,可以帮助咱们绘制各种各样的图形。
那么对于咱们本次的烟花绘制而言,同样需要借助canvas的能力。
所以在html区域部分,我们必须提供一个canvas绘制区:
<!-- 烟花渲染区 --> <canvas></canvas>
html 区域总结
当咱们完成基本的html绘制之后,运行代码到浏览器,效果应该是这个样子的:

啥都没有对吧,别着急,下面咱们去处理css部分。
2. css
css 处理的核心目的,是为了帮助咱们绘制文字区域的样式(没错,与烟花无关)。
所以,整个css区域绘制会比较简单
咱们直接来看代码:
html, body { padding: 0px; margin: 0px; background: #222; font-family: 'Karla', sans-serif; color: #fff; height: 100vh; overflow: hidden; } .title { z-index: 1000; position: fixed; bottom: 12px; right: 12px; // 此处修改了字体 font-family: Cambria, Cochin, Georgia, Times, 'Times New Roman', serif; border: 2px solid #fff; padding: 7.5px 15px; background: rgba(0, 0, 0, 0.5); border-radius: 3px; overflow: hidden; } h1 { text-align: right; font-size: 46px; } h2 { font-size: 36px; } canvas { width: 100%; height: 100%; }
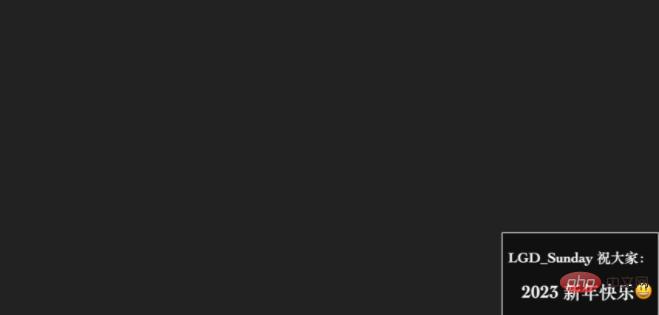
绘制了css之后,页面效果应该是这个样子的:
3. 核心区域:JavaScript
接下来就让咱们进入烟花绘制,最核心的部分JavaScript的处理,在这部分咱们要利用canvas的绘制能力,构建出烟花效果。
整个js的内容,我们把它分为四大部分:
- 烟花类 Firework:这里咱们会通过
function构建构造函数,创建出自底向上的烟花升起效果。
 2. 火花类 Spark:烟花上升到一定位置,会“绽放“,绽放之后变为”火花“,火花类就是处理绽放之后的火花效果的。

-
渲染函数 render:想要完成整个绽放,需要对页面进行不断地重绘,否则”动画“会卡在一个点不动。所以此时就需要借助到渲染函数,咱们把它叫做
render(vue 代码对我影响颇深啊) -
工具函数:工具函数主要包含两个,咱们分开去说:
- 持续绘制函数 drawCircle:该函数可以帮助我们,在每次重新渲染时,进行烟花和火花的绘制
- 随机色值函数 randomColor:该函数可以帮助我们,得到一个随机的烟花色值,用来生成新的烟花
那么明确好大致分类之后,接下来咱们就一步一步的进行实现。
但是大家要注意:为了保证逻辑的通畅性,咱们需要从工具函数开始进行绘制。
1. 工具函数
在刚才咱们说过,工具函数主要包含两个,那么首先先来看第一个工具函数drawCircle,它的主要作用是:在每次重新渲染时,进行烟花和火花的绘制
// 获取 canvas 上下文,并指定宽高 let ctx = document.querySelector('canvas').getContext('2d') ctx.canvas.width = window.innerWidth ctx.canvas.height = window.innerHeight /** * 持续绘制 */ function drawCircle(x, y, radius, color) { color = color ctx.fillStyle = color ctx.fillRect(x - radius / 2, y - radius / 2, radius, radius) }
在上面的代码中:
- 首先:我们拿到了
ctx,也就是CanvasRenderingContext2D二维渲染上下文 ,利用它可以进行绘制渲染 - 然后:把
canvas的宽高指定为页面宽高 - 最后:构建了
drawCircle函数,进行持续绘制。它接收四个参数:x:绘制的 x 坐标y:绘制的 y 坐标radius:点的直径(宽高)color:色值
那么此时,只要触发 drawCircle 函数,就可以进行持续绘制。
工具函数绘制完成之后,下面我们来看第二个函数:随机色值 randomColor:
/** * 生成随机色值 */ function randomColor() { const r = Math.floor(Math.random() * 255) const g = Math.floor(Math.random() * 255) const b = Math.floor(Math.random() * 255) return `rgb(${r},${g},${b})` }
randomColor 函数,主要利用Math.random 生成了一个 0-255 的随机数,三个随机数共同组成了rgb 色值。
2. 烟花类 Firework
有了工具函数之后,下面咱们就可以处理烟花类 Firework。
烟花类本质上是:自底向上的,烟花升起效果。 其核心是:生成可以被 drawCircle 绘制的对象
所以它内部必然包含:坐标、绽放点、色彩 等属性:
/** * 烟花构造 */ function Firework(x, y) { // 初始点 this.x = x || Math.random() * ctx.canvas.width this.y = y || ctx.canvas.height // 绽放点 this.burstLocation = (Math.random() * ctx.canvas.height) / 2 // 绽放是否已完毕 this.over = false // 烟花色 this.color = randomColor() }
在上面的代码中:
x、y:表示烟花升起的坐标。其中y中默认为浏览器底部,x则可以随机burstLocation:表示定义的绽放点。通常小于屏幕高度的一半,即:在屏幕上半部分”绽放“over:表示当前实例对象是否已经绽放完毕了。完毕的实例将不再处理color:随机得到的烟花色
仅有属性还不够,因为烟花还需要 ”动起来“,所以咱们还需要为它赋值三个方法,以帮助它进行移动、持续绘制、绽放:
// 初始绽放数 const OVERLAP_NUM = 66 // 刷新速度 ms const TIME_STEP = 16 // 烟花移动的速度与方向控制 const WALK = 0.2 // 火花数组 let sparks = [] // 烟花数组 let fireworks = [] /** * 烟花构造 */ function Firework(x, y) { ... /** * 移动的方法 */ this.move = function () { // 横向偏移 this.x += WALK // 上升与绽放 if (this.y > this.burstLocation) { this.y -= 1 } else { this.burst() } } /** * 持续绘制 */ this.draw = function () { drawCircle(this.x, this.y, 1.5, this.color) } /** * 绽放方法 */ this.burst = function () { // 标记绽放完毕 this.over = true // 碎裂烟花数 let i = Math.floor(Math.random() * 150) + 10 // 构建碎裂对象 while (i--) { sparks.push(new Spark(this.x, this.y, this.color)) } } }
在上面的代码中,咱们一共构建了三个方法:
move:用来处理烟花上升。在上升的过程中,可以通过this.x += WALK来进行横向的”微调“,这样会更加漂亮draw:用来进行持续绘制。主要借助了drawCircle完成burst:处理绽放。当烟花上升到指定位置时,就需要进行绽放处理。所有的绽放过程,将交由Spark类处理。
3. 火花类 Spark
当烟花逐渐上升到一定位置之后,则需要进行绽放。
而所谓的绽放就是:烟花爆炸之后迸现出的火花。这一块的过程,咱们将通过Spark进行处理。
烟花绽放时,将迸现出大量的火花,其中每一个火花,都是一个Spark实例。
所以针对于Spark而言,它代表的是:单个火花,从出现到消亡的过程。
那么对于 Spark 它内部的代码来说,总体也是分为:属性、方法 两部分。
首先咱们先来看属性:
/** * 火花构造 */ function Spark(x, y, color) { // 标记绽放点位置与色值 this.x = x this.y = y this.color = color // 位置 this.dir = Math.random() * (Math.PI * 2) // 执行完毕 this.over = false // 火花崩裂速度 this.speed = Math.random() * 3 + 3 // 火花下坠的速度 this.gravity = Math.random() + 0.1 // 火花消失的速度 this.countdown = this.speed * 10 }
对于以上代码来说:
x、y、color:表示绽放的位置与色值dir:表示绽放后的位置over:表示绽放完成speed:火花崩裂之后的运行速度gravity:火花开始下坠时的速度,它在计算时会进行递增(加速)countdown:消失的倒计时
有了属性之后,下面咱们需要通过两个方法,来保证Spark的移动和绘制:
/** * 火花构造 */ function Spark(x, y, color) { ... /** * 火花移动方法 */ this.move = function () { // 倒计时处理 this.countdown-- if (this.countdown < 0) { this.over = true } // 速度递减 if (this.speed > 0) { this.speed -= 0.1 } if (this.speed < 0) { return } // x、y 坐标位置 this.x += Math.cos(this.dir + WALK) * this.speed this.y += Math.sin(this.dir + WALK) * this.speed this.y += this.gravity // 下坠速度加快 this.gravity += 0.05 } /** * 绘制 */ this.draw = function () { drawCircle(this.x, this.y, 3, this.color) } }
其中:
move:代表移动的过程。在这里咱们利用Math.cos 和 Math.sin 计算了坐标位置,并且通过this.gravity += 0.05增加了烟花下坠的速度。draw:代表持续绘制。同样需要利用drawCircle方法。
4. 渲染函数 render
那么最后,咱们就可以来构建render函数。
render 函数的核心作用是:保证烟花的不断渲染。要达到这个目的,咱们就必须要保证render 函数不断重复执行
想要让render重复执行其实有两种方式:
1.window.requestAnimationFrame:该方法可以保证高性能的持续重绘。但是 在高刷屏幕下会导致 ”速率过快“2.window.setTimeout:该方法可以通过delay控制速率,所以在当前场景中比较推荐。
/** * 渲染函数 */ function render() { // 夜幕背景色与区域 ctx.fillStyle = 'rgba(0, 0, 0, 0.1)' ctx.fillRect(0, 0, ctx.canvas.width, ctx.canvas.height) // 烟花上升 for (let firework of fireworks) { if (firework.over) { continue } firework.move() firework.draw() } // 火花下坠 for (let spark of sparks) { if (spark.over) { continue } spark.move() spark.draw() } // 通过随机数来控制烟花产生速度 if (Math.random() < 0.05) { fireworks.push(new Firework()) } // 重复渲染 setTimeout(render, TIME_STEP) }
5. 完整代码
因为整套的js代码比较多,所以咱们在最后,把整个的js代码给大家贴出来(因为我不相信你们会一步一步跟着学 ??????),以方便大家随取随用(我是不是很周到??????)
// 获取 canvas 上下文,并指定宽高 let ctx = document.querySelector('canvas').getContext('2d') ctx.canvas.width = window.innerWidth ctx.canvas.height = window.innerHeight // 初始绽放数 const OVERLAP_NUM = 66 // 刷新速度 ms const TIME_STEP = 16 // 烟花移动的速度与方向控制 const WALK = 0.2 // 火花数组 let sparks = [] // 烟花数组 let fireworks = [] // 初始爆炸的填充逻辑 for (let i = 0; i < OVERLAP_NUM; i++) { // 填充 fireworks.push( // 构建随机位置 new Firework( Math.random() * window.innerWidth, Math.random() * window.innerHeight ) ) } /** * 渲染函数 */ function render() { // 夜幕背景色与区域 ctx.fillStyle = 'rgba(0, 0, 0, 0.1)' ctx.fillRect(0, 0, ctx.canvas.width, ctx.canvas.height) // 烟花上升 for (let firework of fireworks) { if (firework.over) { continue } firework.move() firework.draw() } // 火花下坠 for (let spark of sparks) { if (spark.over) { continue } spark.move() spark.draw() } // 通过随机数来控制烟花产生速度 if (Math.random() < 0.05) { fireworks.push(new Firework()) } // 重复渲染 setTimeout(render, TIME_STEP) } /** * 火花构造 */ function Spark(x, y, color) { // 标记绽放点位置与色值 this.x = x this.y = y this.color = color // 位置 this.dir = Math.random() * (Math.PI * 2) // 执行完毕 this.over = false // 火花崩裂速度 this.speed = Math.random() * 3 + 3 // 火花下坠的速度 this.gravity = Math.random() + 0.1 // 火花消失的速度 this.countdown = this.speed * 10 /** * 火花移动方法 */ this.move = function () { // 倒计时处理 this.countdown-- if (this.countdown < 0) { this.over = true } // 速度递减 if (this.speed > 0) { this.speed -= 0.1 } if (this.speed < 0) { return } // x、y 坐标位置 this.x += Math.cos(this.dir + WALK) * this.speed this.y += Math.sin(this.dir + WALK) * this.speed this.y += this.gravity // 下坠速度加快 this.gravity += 0.05 } /** * 绘制 */ this.draw = function () { drawCircle(this.x, this.y, 3, this.color) } } /** * 烟花构造 */ function Firework(x, y) { // 初始点 this.x = x || Math.random() * ctx.canvas.width this.y = y || ctx.canvas.height // 绽放点 this.burstLocation = (Math.random() * ctx.canvas.height) / 2 // 绽放是否已完毕 this.over = false // 烟花色 this.color = randomColor() /** * 移动的方法 */ this.move = function () { // 横向偏移 this.x += WALK // 上升与绽放 if (this.y > this.burstLocation) { this.y -= 1 } else { this.burst() } } /** * 持续绘制 */ this.draw = function () { drawCircle(this.x, this.y, 1.5, this.color) } /** * 绽放方法 */ this.burst = function () { // 标记绽放完毕 this.over = true // 碎裂烟花数 let i = Math.floor(Math.random() * 150) + 10 // 构建碎裂对象 while (i--) { sparks.push(new Spark(this.x, this.y, this.color)) } } } /** * 持续绘制 */ function drawCircle(x, y, radius, color) { color = color ctx.fillStyle = color ctx.fillRect(x - radius / 2, y - radius / 2, radius, radius) } /** * 生成随机色值 */ function randomColor() { const r = Math.floor(Math.random() * 255) const g = Math.floor(Math.random() * 255) const b = Math.floor(Math.random() * 255) return `rgb(${r},${g},${b})` } // 开始 render()
总结
三年抗疫,咱们共同经历了封控、裁员、降薪等一系列让人感到”始料未及“的事情。
我甚至一度以为将来会变成”封控常态化“、”裁员常态化“、”降薪常态化“。
但是在新的2023年到来之前,所有的一切都已经变成了过去式。
让我们用一场烟花告别过去,迎接未来!
2023 年将会是一个好的年度,大家一起加油!
在这里:Sunday 祝大家:新年快乐,兔年大吉!
声明:本文转载于:juejin,如有侵犯,请联系admin@php.cn删除
- 上一篇:程序员在Boss上投简历要注意了!
- 下一篇:没有了
 站长资讯网
站长资讯网