
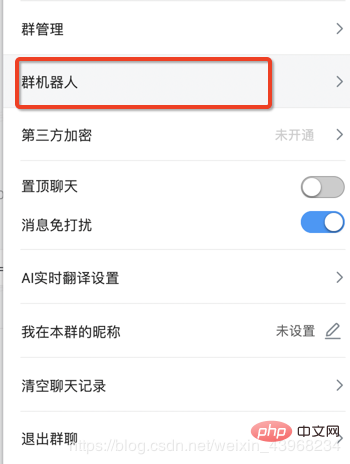
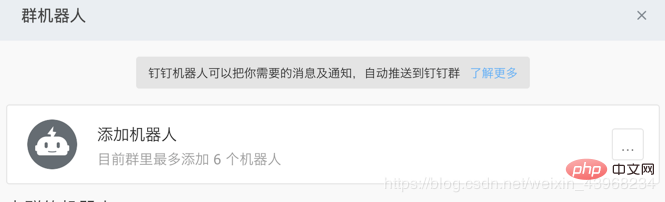
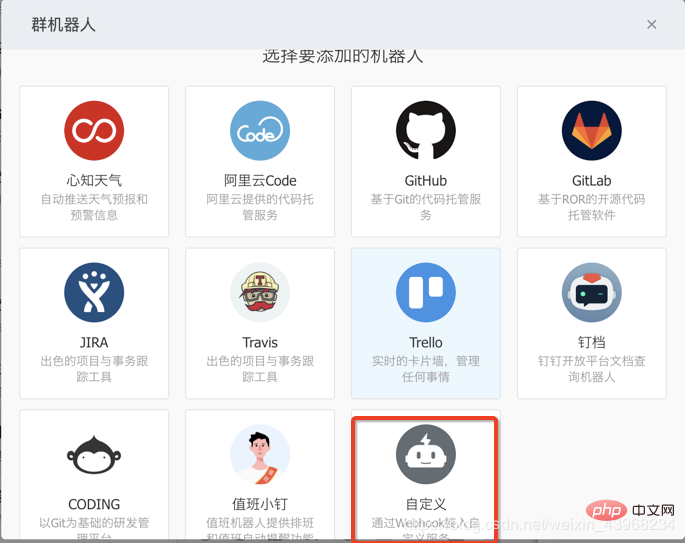
先建个钉钉群,并加好机器人
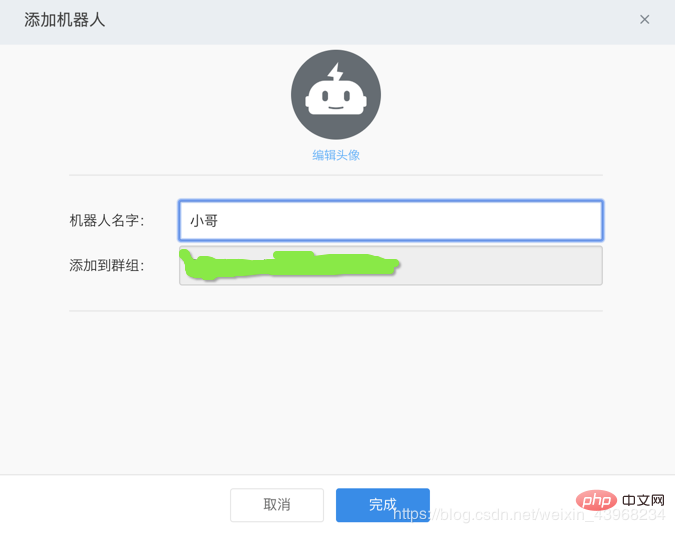
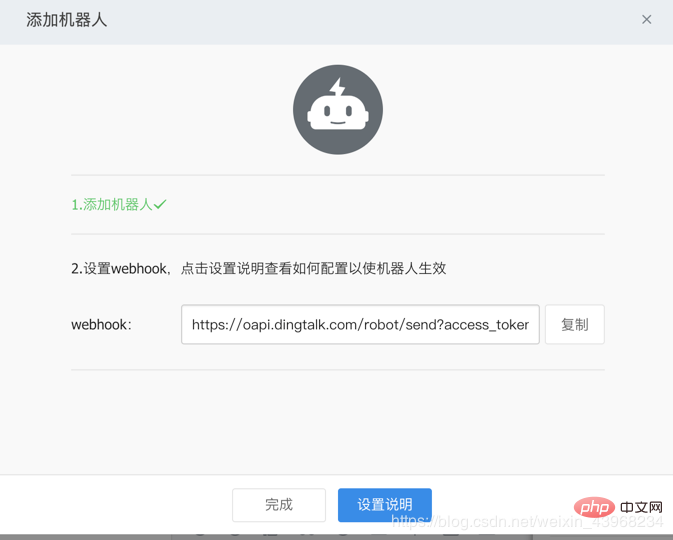

此时,机器人已经添加完毕,接下来编写我们连接机器人小哥的代码
import com.alibaba.fastjson.JSON; import com.google.common.collect.Lists; import com.google.common.collect.Maps; import java.util.List; import java.util.Map; /** * @author yanghao * @version DingTalkTest.java, v 0.1 2019-03-29 11:36 */ public class DingTalkTest { public static void main(String[] args){ try { //钉钉机器人地址(配置机器人的webhook) String dingUrl = "https://oapi.dingtalk.com/robot/send?access_token=............"; //是否通知所有人 boolean isAtAll = false; //通知具体人的手机号码列表 List<String> mobileList = Lists.newArrayList(); //钉钉机器人消息内容 String content = "小哥,你好!"; //组装请求内容 String reqStr = buildReqStr(content, isAtAll, mobileList); //推送消息(http请求) String result = HttpUtil.postJson(dingUrl, reqStr); System.out.println("result == " + result); }catch (Exception e){ e.printStackTrace(); } } /** * 组装请求报文 * @param content * @return */ private static String buildReqStr(String content, boolean isAtAll, List<String> mobileList) { //消息内容 Map<String, String> contentMap = Maps.newHashMap(); contentMap.put("content", content); //通知人 Map<String, Object> atMap = Maps.newHashMap(); //1.是否通知所有人 atMap.put("isAtAll", isAtAll); //2.通知具体人的手机号码列表 atMap.put("atMobiles", mobileList); Map<String, Object> reqMap = Maps.newHashMap(); reqMap.put("msgtype", "text"); reqMap.put("text", contentMap); reqMap.put("at", atMap); return JSON.toJSONString(reqMap); } }
运行结果如下:
result == {"errmsg":"ok","errcode":0}
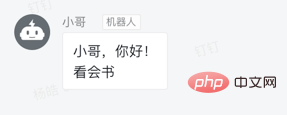
钉钉群显示消息:
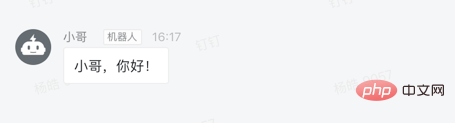
ok,简单的消息推送,这就完成了!
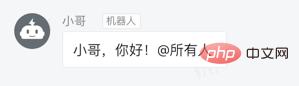
我们再来测试一下通知所有人和通知具体人
将isAtAll更改为true
//是否通知所有人 boolean isAtAll = true; //通知具体人的手机号码列表 List<String> mobileList = Lists.newArrayList();
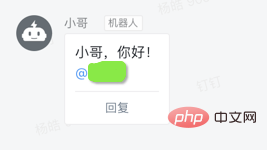
增加通知人号码列表(注:isAtAll和mobileList 不能同时生效)
//是否通知所有人 boolean isAtAll = false; //通知具体人的手机号码列表 List<String> mobileList = Lists.newArrayList(); mobileList.add("182********");
再来测试一下特殊符号
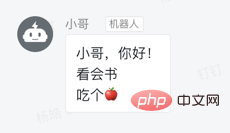
换行标识符
/** * 换行标识符 */ private static final String NEWLINE = "n"; //钉钉机器人消息内容 //String content = "小哥,你好!"; StringBuffer sb = new StringBuffer(); sb.append("小哥,你好!") .append(NEWLINE) .append("看会书"); String content = sb.toString();
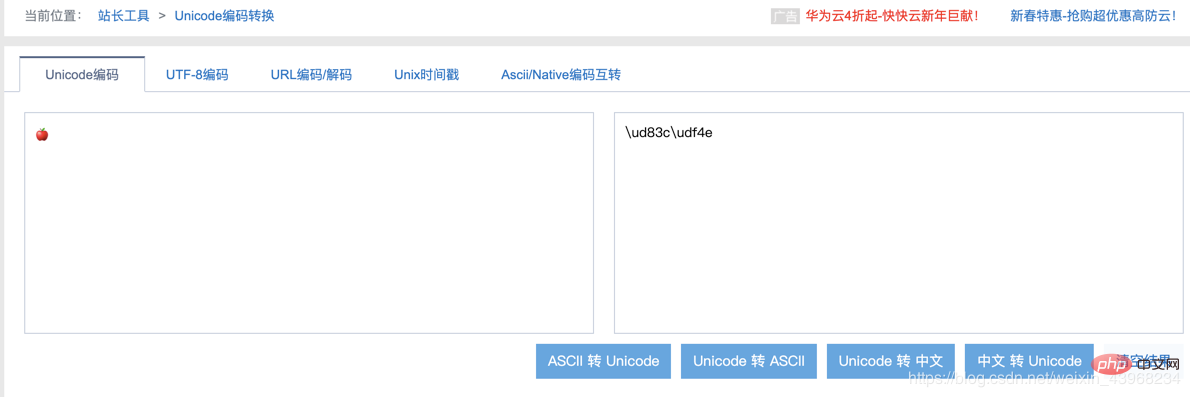
emoji图片
先获取emoji图片的unicode编码
编写代码如下:
/** * 苹果unicode编码 */ private static final String APPLE = "ud83cudf4e"; //钉钉机器人消息内容 //String content = "小哥,你好!"; StringBuffer sb = new StringBuffer(); sb.append("小哥,你好!") .append(NEWLINE) .append("看会书") .append(NEWLINE) .append("吃个").append(APPLE); String content = sb.toString();
通常在我们的项目中,作为一些告警加入,方便且实用
很有意思的钉钉机器人,很多实用技巧,可以深入去探索一波!
更新于2019-12-05
很多小伙伴留言咨询http请求,这边给大家2个http请求代码
1. maven项目
添加依赖
<!--糊涂工具--> <dependency> <groupId>cn.hutool</groupId> <artifactId>hutool-all</artifactId> <version>4.0.12</version> </dependency>
http请求代码
private static final int timeout = 10000; public static String postJson(String url, String reqStr) { String body = null; try { body = HttpRequest.post(url).body(reqStr).timeout(timeout).execute().body(); } catch (Exception e) { e.printStackTrace(); } return body; }
2. 非maven项目
添加jar包
httpclient-xxx.jar
commons-logging-xxx.jar
http请求代码
public static String postJson(String url, String body) { // 创建Httpclient对象 CloseableHttpClient httpClient = createCustomClient(); CloseableHttpResponse response = null; String resultString = null; try { // 创建Http Post请求 HttpPost httpPost = new HttpPost(url); httpPost.addHeader("Content-Type", "application/json"); if (body != null) { httpPost.setEntity(new StringEntity(body, "utf-8")); } // 执行http请求 response = httpClient.execute(httpPost); resultString = EntityUtils.toString(response.getEntity(), "utf-8"); } catch (Exception e) { e.printStackTrace(); } finally { try { if (response != null) { response.close(); } } catch (Exception e) { e.printStackTrace(); } } return resultString; } public static CloseableHttpClient createCustomClient() { RequestConfig defaultRequestConfig = RequestConfig.custom() .setSocketTimeout(120 * 1000) .setConnectTimeout(120 * 1000) .setConnectionRequestTimeout(120 * 1000) .setStaleConnectionCheckEnabled(true) .build(); return HttpClients.custom().setDefaultRequestConfig(defaultRequestConfig).build(); }
方法仅供参考,项目里面有现成的http请求,可以直接用!
相关学习推荐:java基础教程
